Welcome to the Spring update for 2024. It’s a bit of a rambling read about art and design and new releases, so if you like that sort of thing read on.
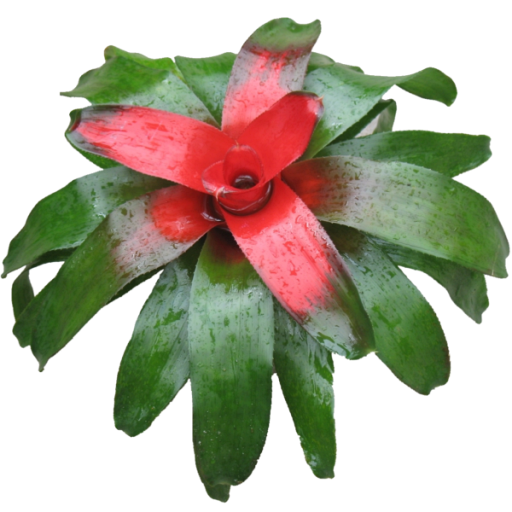
In Australia, it’s Spring once again and the garden is waking up for another growing season. Spring weather had started about a month ago as many plants came out of Winter dormancy early. Other than a couple of frosty nights here in Melbourne, the days have been warm and sunny. We’ve had frequent rain too, so it looks like this growing season is going to be long and a bumper crop in the vegie patch. I suspect it will be a good year for growing tomatoes.
While I could talk for days about gardening, that’s not what I’m here for. I’m here to talk about the ‘Spring Catalogue’ and the new range of products I’m releasing for Spring. There is a whole new line of packaging boxes to show you. I’ve been busting to show them off but held back while I tweaked the final designs and ironed out the production-side of things
Now that Spring is here, it’s time to launch the Spring Catalogue!
Creating the Spring Catalogue
Wow! What a wild ride the past 3 months has been! In a good way. Every Winter, I buckle down and do design work or long-form writing while the weather is cold. This year, I developed a whole new line of packaging boxes and display stands for the remedies, which I have talked about in previous posts.
In June, the start of our Winter, I was running low on packaging boxes for the remedies and needed to restock. Rather than simply reprint the same design, I decided to stop and ‘rethink’ the packaging I was using. The old design served me well and while there were a couple of design improvements I could make, I decided to scrap the design and go back to the drawing board. And start from scratch. Literally.
I realized that the previous design was great for shipping product but lousy for use in a clinic. The lid design was causing problems with accessibility, so I decided to scrap the ‘box-with-lid’ design and create open-aired, display stands. Display stands made it easier to select remedies, so I started with that idea. Then I thought about how to design a display stand that was tailor-made to how a practitioner or kinesiologist works.
Next, I decided that the display stands needed to be artistic and appealing, so that they added to the room decor. So I came up with some basic designs and sketched them in my CAD software. As I had always created my own graphics, learning CAD and 3d design was fairly straightforward. But not without hiccups. Finding the right software was one hurdle. The next was learning all the tools I needed to translate my ideas into 3d models that I could 3d print. Next was learning about 3d printing. Once that was done, learning how to work a 3d printer so that the results were polished.
I spend the first 6 weeks of Winter learning about industrial design, CAD, best software, etc. It wasn’t until mid July did I sit down and crank out the designs. And boy, once I knew how to work the software, did I create!
After 3 months and a semi-steep learning curve, I am happy to say that I have a whole new line of packaging ready to go. With 10 designs ready and more on the way.
Box 2.0, ‘Workstation’
As I was learning CAD design as well as 3d print / plastics manufacturing and was fast running out of boxes, I decided to start with a really design. A square, 5×5 grid design to replace the boxes I was running out of.
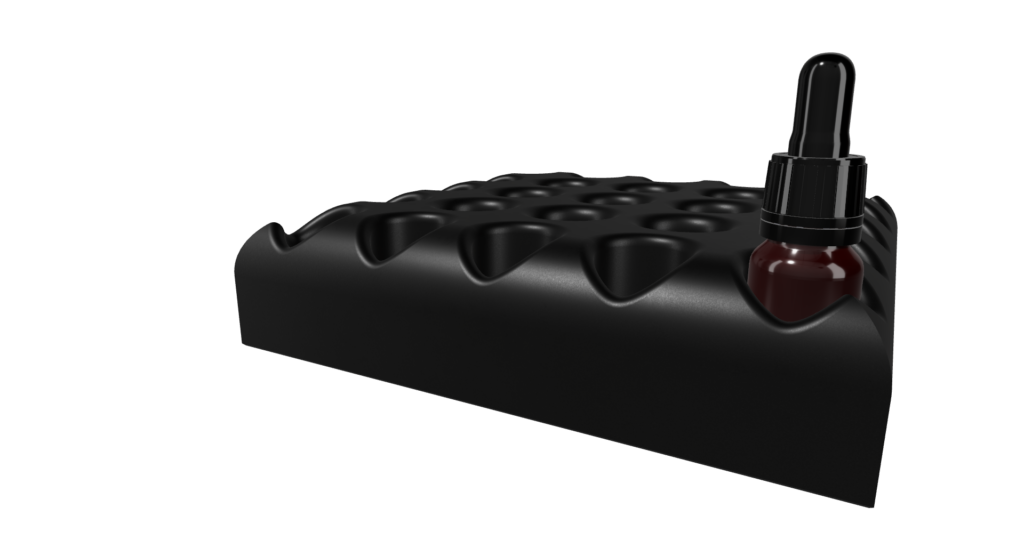
The design was pretty simple. A 23cmx23cm box. I created the design, printed the prototypes to check on hole sizes, etc and found that my new 3d printer exceeded my expectations. The print quality was amazing, for a consumer-grade plastic moulding machine.
As I was designing, I decided to create a series of ‘desk tiles’ with the same dimensions so that they could be paired to create a neat sideboard. A box for 15ml flower remedies, one for 4ml allergy vials, one for 10ml Bach flowers as well as some other commonly used tools in a clinic. The idea was to create a modular set of display stands – a ‘workstation’ – that a practitioner could custom-build to meet their requirements.
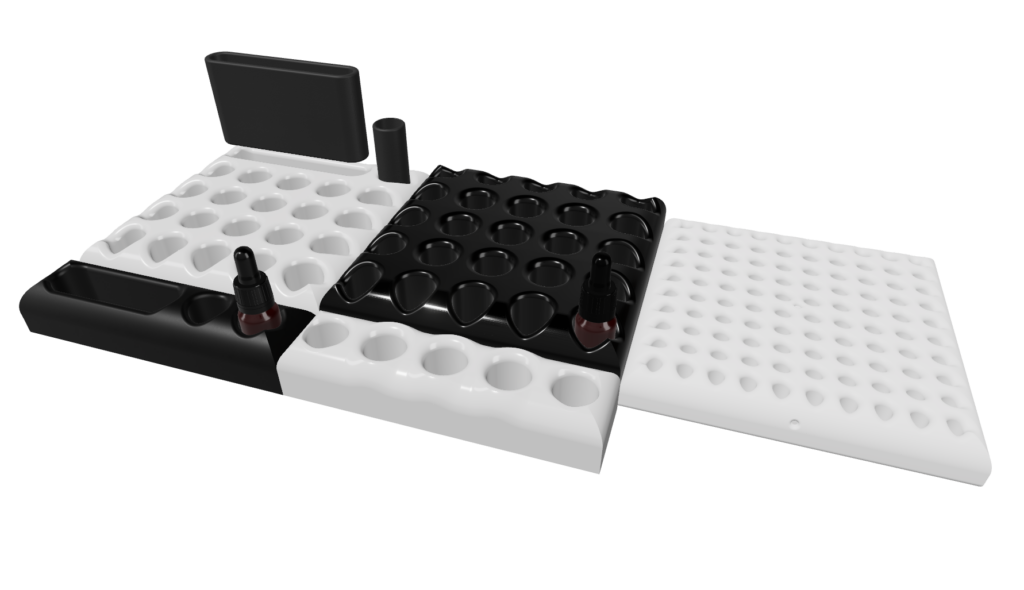
Once I had some designs drawn up, I chose some basic color schemes and published them in the shopping cart. They are ready to print-on-demand. I plan to expand the workstation catalogue over time with new tool caddies and book stands, but for now, the basic 5×5 box I will use to replace the old cardboard box is ready. So I’m happy.
Sacred Geometry
Once the basic ‘square’ designs were complete, it was time to design something a little more creative and radical. While the desk tiles I created looked professional and slick, I wanted to use the capabilities of my 3d printer to create some more artistic designs, in different shapes, sizes and colors.
As the Skyflowers are plants from the Pineapple family of plants, I thought it was time to design a range of Pineapple-themed display stands. This really tested out my CAD design skills. Drawing lines and squares is one thing, but drawing circular objects required me to level-up my skills. But as I was drawing and learning new design techniques, the process took on a life of it’s own and spirit took over. Every day I seemed to make a quantum leap in terms of design and after a few weeks I went from back shapes to some complex geometries that popped.
Especially when I started learning how to draw sacred geometry designs and mandalas. That’s when the designs began to come alive and evolve beyond a boring old box. I wanted to create a series of display stands that held flower remedies that were art pieces. Sculptures. Optical illusions that drew the eye.

When I came across sacred geometry, I realized that I had found the holy grail of graphic design. So, using the ‘seed of life’ and ‘flower of life’ as the basis for my designs, i came up with about severalPineapple-themed display stands in different shapes and holding capacities. The idea was to create a sculpture of a plant, that also held flower remedies. Reminding the practitioner of what they are working with – life force, not just bottles.
After sketching the flower of life and turning it into a pineapple, I elaborated on the same sketch and came up with a Pineapple-themed line of packaging for the Skyflowers.
- Mini Pineapple for 1x15ml remedy. Cute. ( Not released yet )
- Baby Pineapple for 5x15ml remedies. For the test kits, which i will get to in a minute.
- Pineapple ‘Birthday Cake‘ for 13x15ml remedies. More on this later.
- Pineapple Deluxe Display Stand for 25x15ml remedies. This thing look like a buddhist temple.
- There’s another mid-sized display stand on the drawing board, but it’s still in development.
These are the first plant-related boxes I have in mind. With several more bromeliads like the Chakra Flower to come later. A hint.
Mini Kits
Now that I had two designs to choose from, a square 5×5 tile or a Pineapple-themed sculpture that held the same amount of bottles, I decided to develop a line of giftware. Smaller kits that you could give as a gift.
The Baby Pineapple was perfect for that. It held 5x15ml remedies in a cute round stand that was 14cm wide. I am going to use it for a new range of ‘testing kits’ that are in the pipeline. While I have offered mini sets of remedies before, I never had packaging for them.
Now I do. In tropical colors. Or rainbows if you prefer.
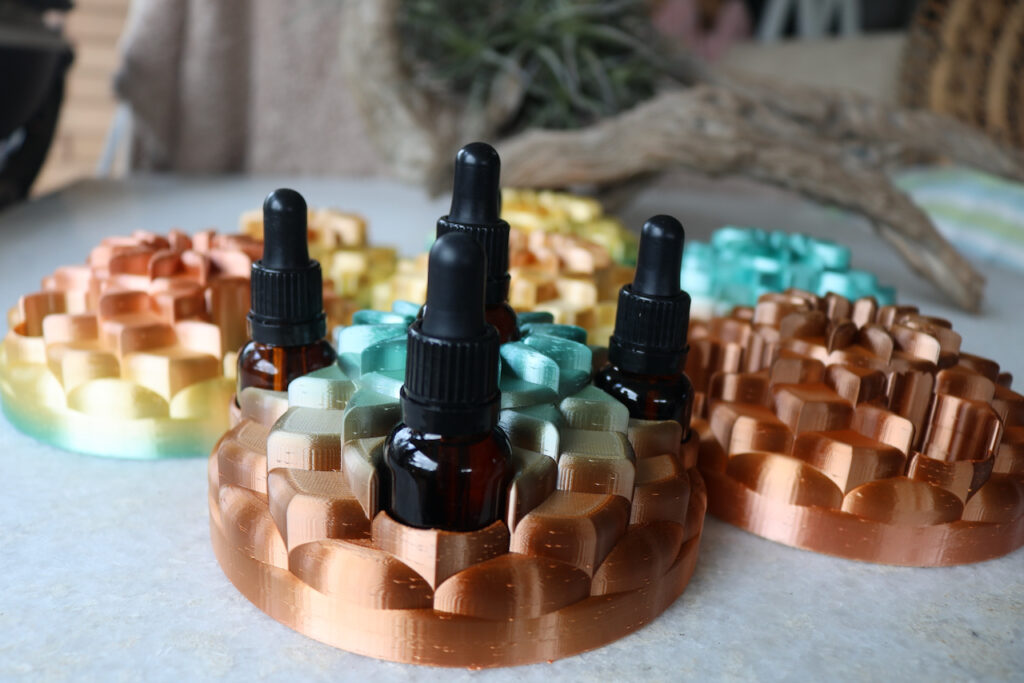
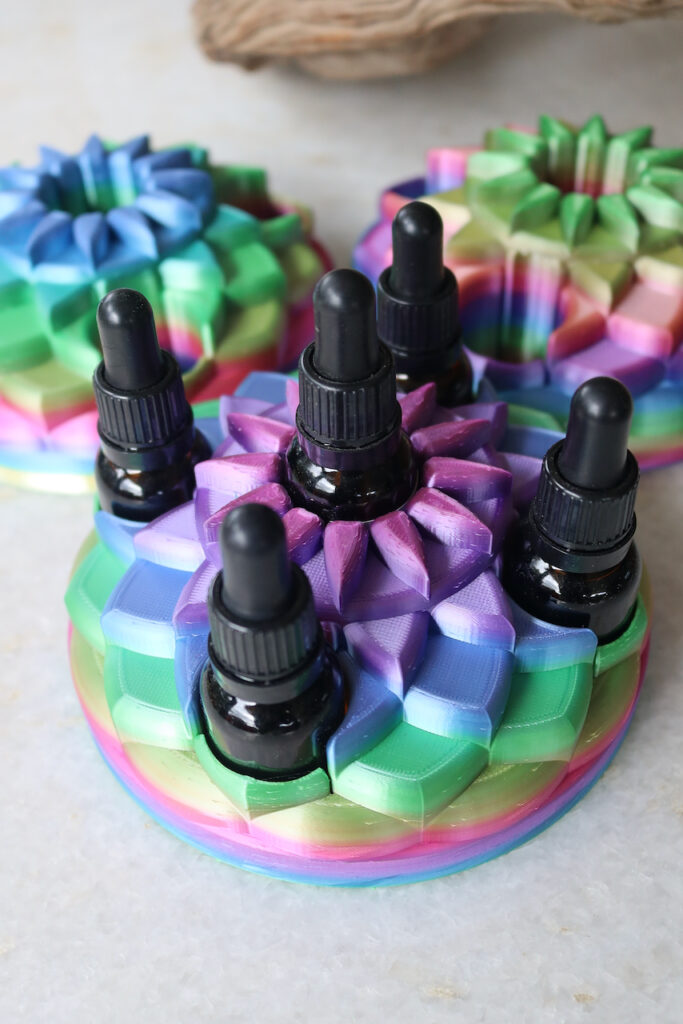
You can buy them empty or as a kit. You can also pick the color at check out and they will be printed up for you. As a default, I’m offering ivory white ( which you can paint ), charcoal grey, tropicana ( yellow, range & green ), rainbow ( right ) and violet flame for the purple lovers. As well as ‘one-off 3d prints’ with other colors and patterns. These limited edition prints will be displayed on a special page.
Instructors will be able to buy ‘a box of mixed doughnuts’ for students also. Perfect to hand out at the start of a workshop or for graduation at the end of a course. More on this package deal later.
But I digress, I was talking about the testing kits. Mini sets of 5 remedies.
The first of the testing kits is the Pineapple Stress-Testing Kit that went live in the shopping cart about a week ago. It features 5x15ml Pineapple remedies, two of which are brand new releases – Ornamental Pineapple for stage 2 stress and Red pineapple for stage 4 stress. These new remedies fit in between the previous 3 Pineapples and ‘flesh out’ the anti-stress remedies.
Other testing kits are in the pipeline and should be released later this year, early next. There are currently about 5 on the drawing board, which group remedies that belong to the same botanical genus together in the same way the Pineapples are. A mini set of Rebirthing flower remedies ( for pro’s ) is near complete as well as a toxicity testing kit after that that features two new release Carpet Bromeliads to augment the other three.
Design Process
Now that I have learned plastics manufacturing, I am at the stage of mass production. In Spring, I will be releasing new designs into the catalogue and ramping up the manufacturing process. I’ve learned the basics and created a workflow – from design to production to shipping – and so all that is left is to market the catalogue to students, instructors and to the internet.
Today, I am playing around with styles and adding textures to the printed boxes. I’ve played around with color, now its time to fine tune the designs with some patterning and texture for look and feel.
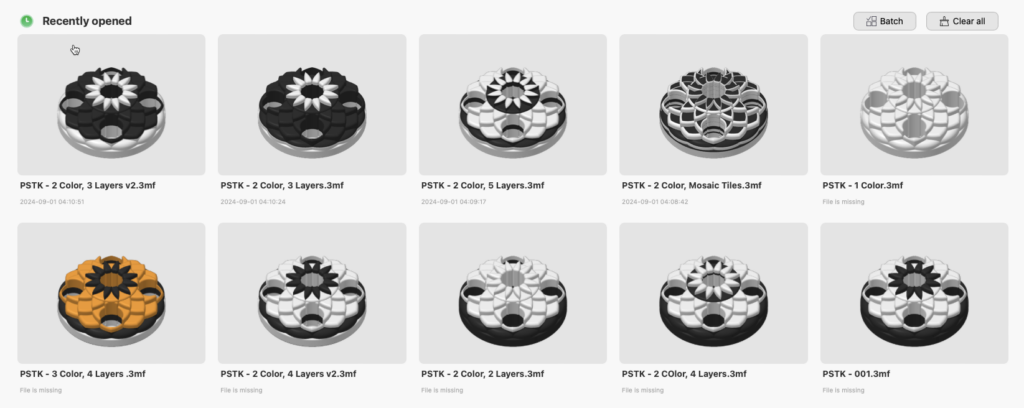
Once a sketch is complete, the 3d model created, a prototype is printed as a proof-of-concept to test the hole dimensions and then styles are created. Then textures can be added and it’s ready for mass production and publishing as a product on the website. There are quite a number of steps to the process, on top of the other processes used to run the company. But 3d printing is fun, so I’m happy to do the work.
The picture above is the same model. But with 10 style variations, so they look wildly different. Nine of the styles above have two colors and one has 3 colors when printed. As the colors can be swapped out to be anything, you can have some pretty crazy combos when printed.
White with rainbows. Yellow with green leaves. Raspberry red and cream to look like a cake. The color combinations are endless. These style presets allow me to manufacture an infinite color range of 3d prints, from the one model. So they won’t be boring to the customer. Or me, to make.
Sneak Peek
That’s about all for now.
While there’s a lot more to be released in the coming weeks, I’ll finish off ‘part 1’ of the Spring catalogue with a sneak peak at some of the larger designs. Here’s the sketch. It’s an aerial view of a pineapple plant and is based on sacred geometry and the seed of life.
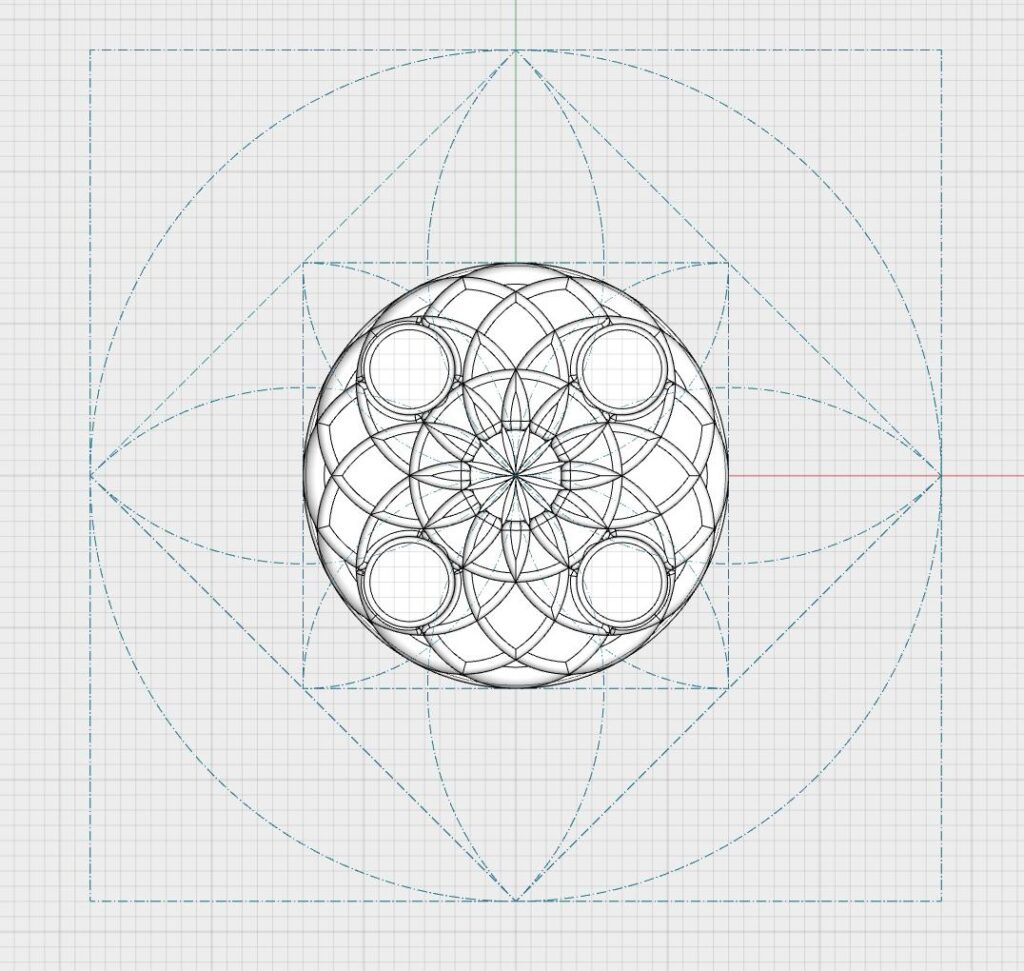
The larger circle is the footprint for the 2025 Box Set and holds 13x15ml remedies.
The outer square is the footprint for the deluxe display stand that holds 25x15ml remedies, both of these models have been completed and will be released this month as part of our Spring catalogue.
The new packaging, the Spring, Summer and Autumn catalogues all pave the way for the release of Clinical Flower Therapy: 1st Edition in Spring of 2025, just 364 days away. Exciting stuff.
Thanks for reading.
